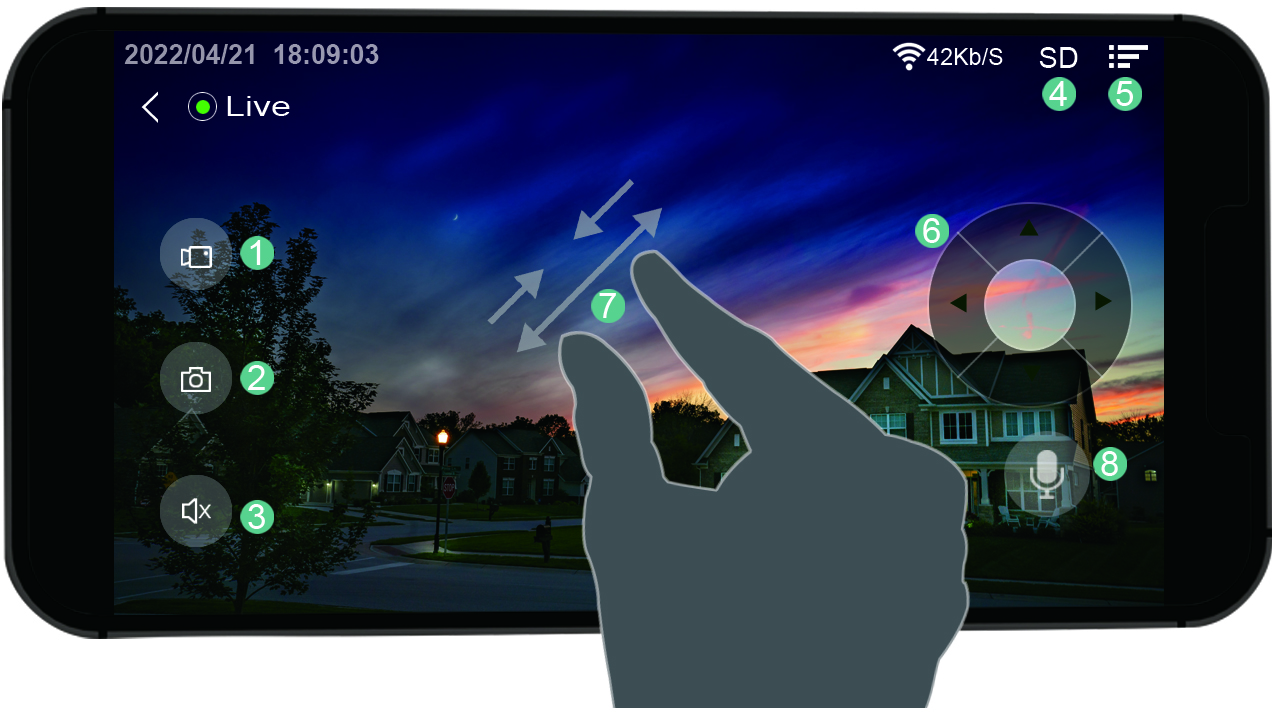
6. Playback and Download Video
The camera is not designed for 24/7 recording. It has two recording methods:
●Methods 1: Manual recording(Refer to page 20)
●Methods 2: Record when motion detection is triggered.
The following content describes the playback of video recordings in method 2.
Tips: If you want to watch Motion Detection record and download videos to your Phone, you need to purchase cloud service or insert a Micro SD card first. If no SD card or no cloud service, VicoHome only store videos from the last 7 days.
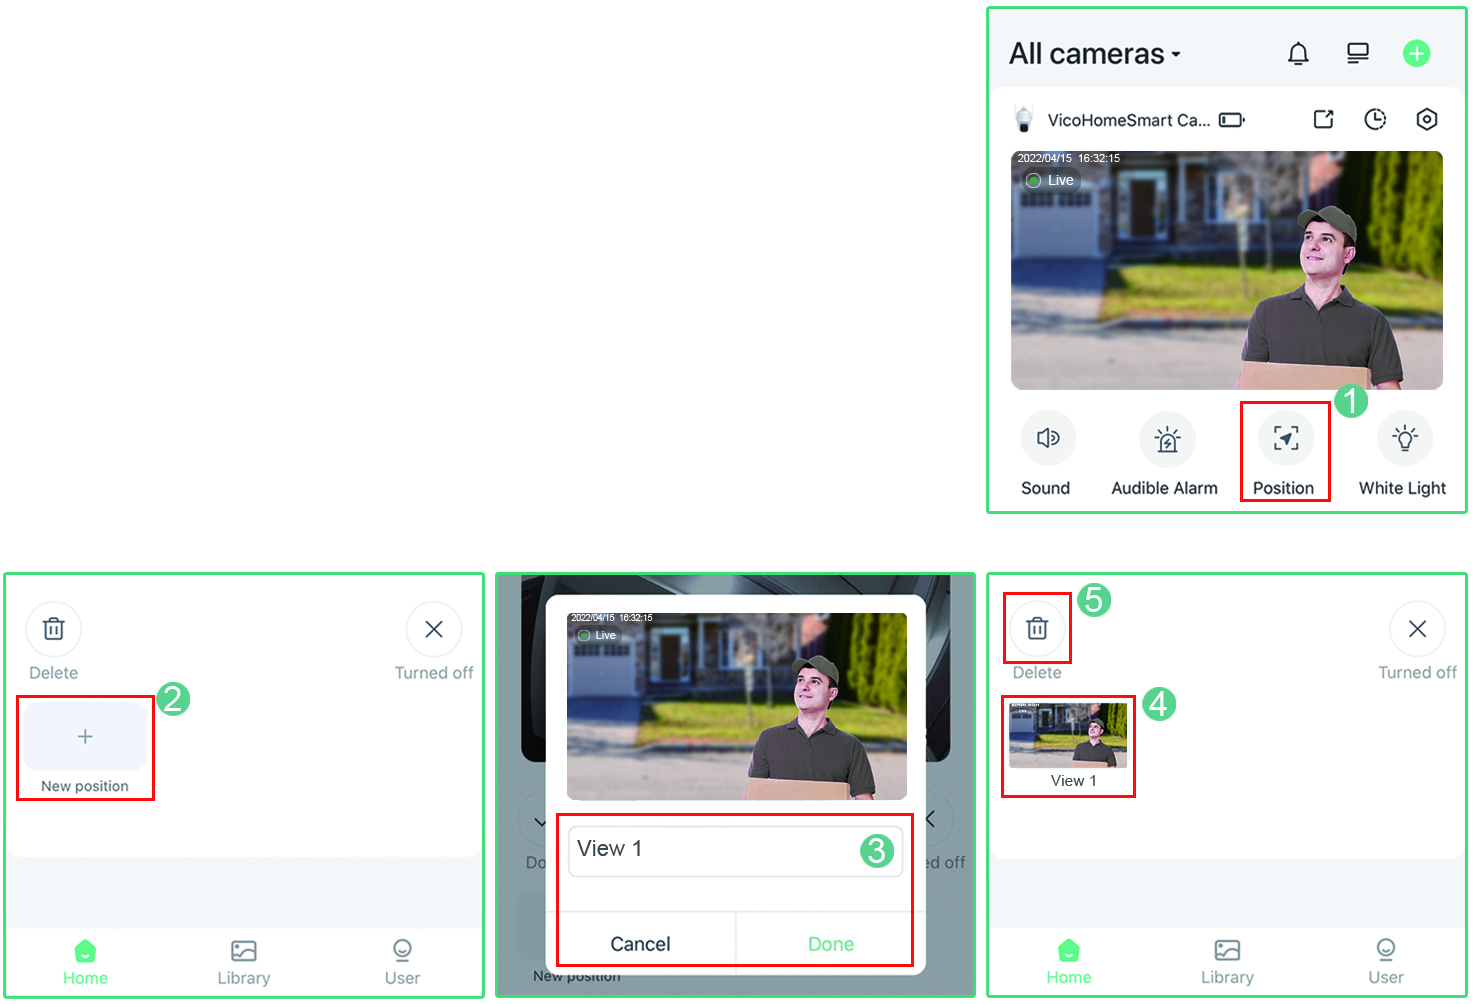
Playback and Download Video in Cloud Storage
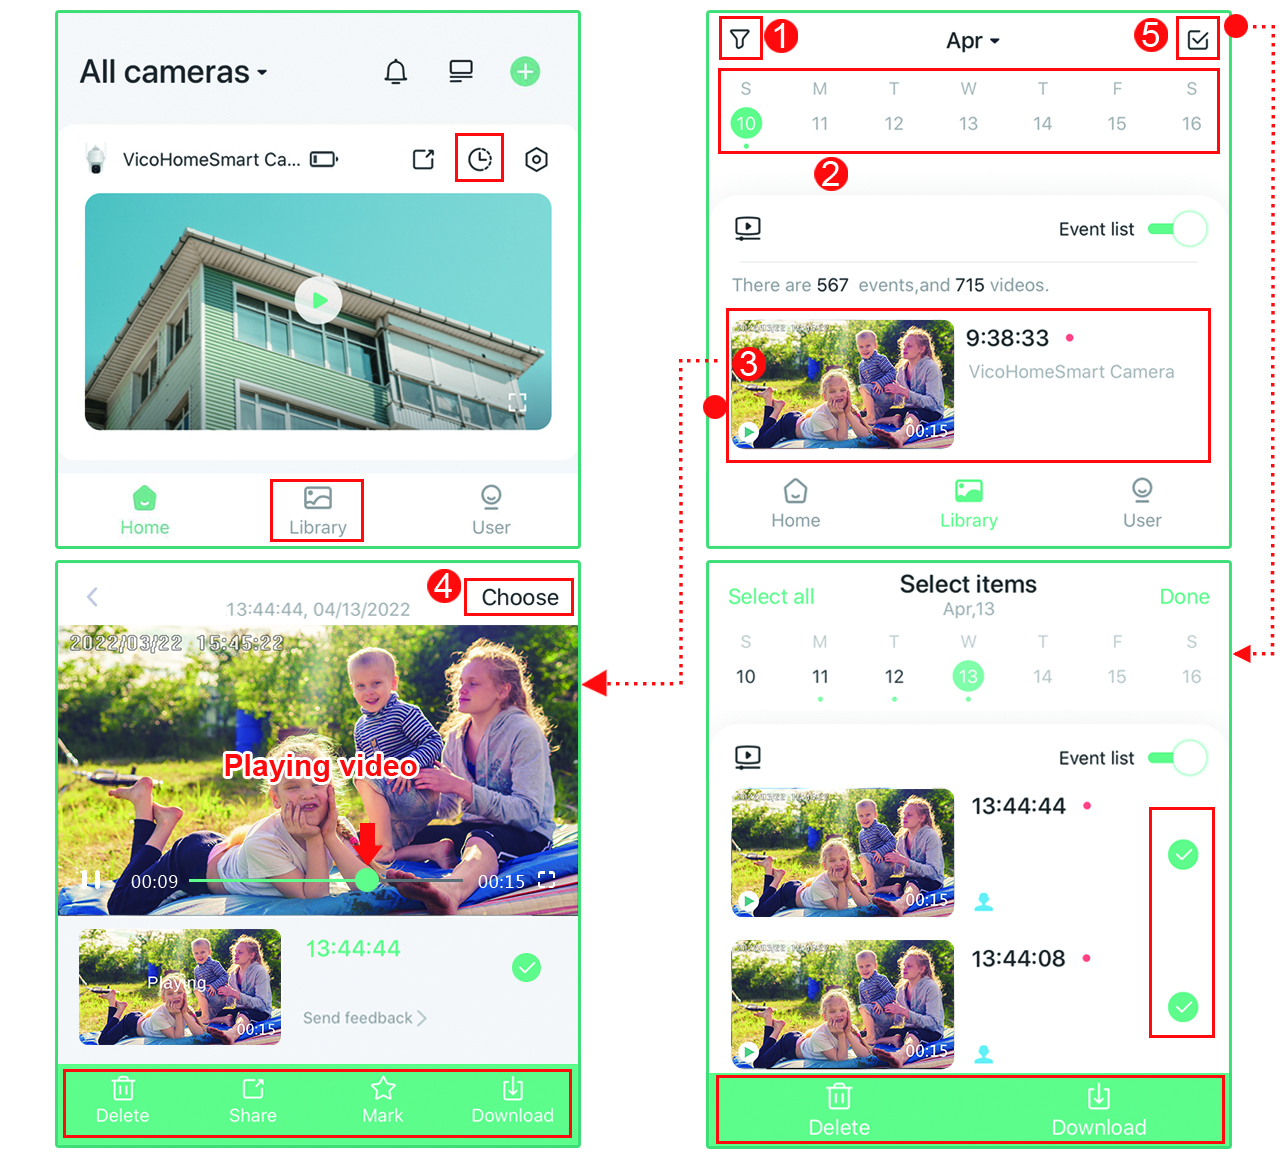
Click “Library” on the homepage, enter Library interface.
1. Filter videos. One of the cameras can be selected, and classification can be selected to filter the videos.
2. Select the date of the record.
3. Click the image to play video.
4. Click “Choose”, check the video to delete, share, mark, download viedo.
5. Click “Edit” button to batch delete and download videos.
Playback and Download Video in Micro SD card
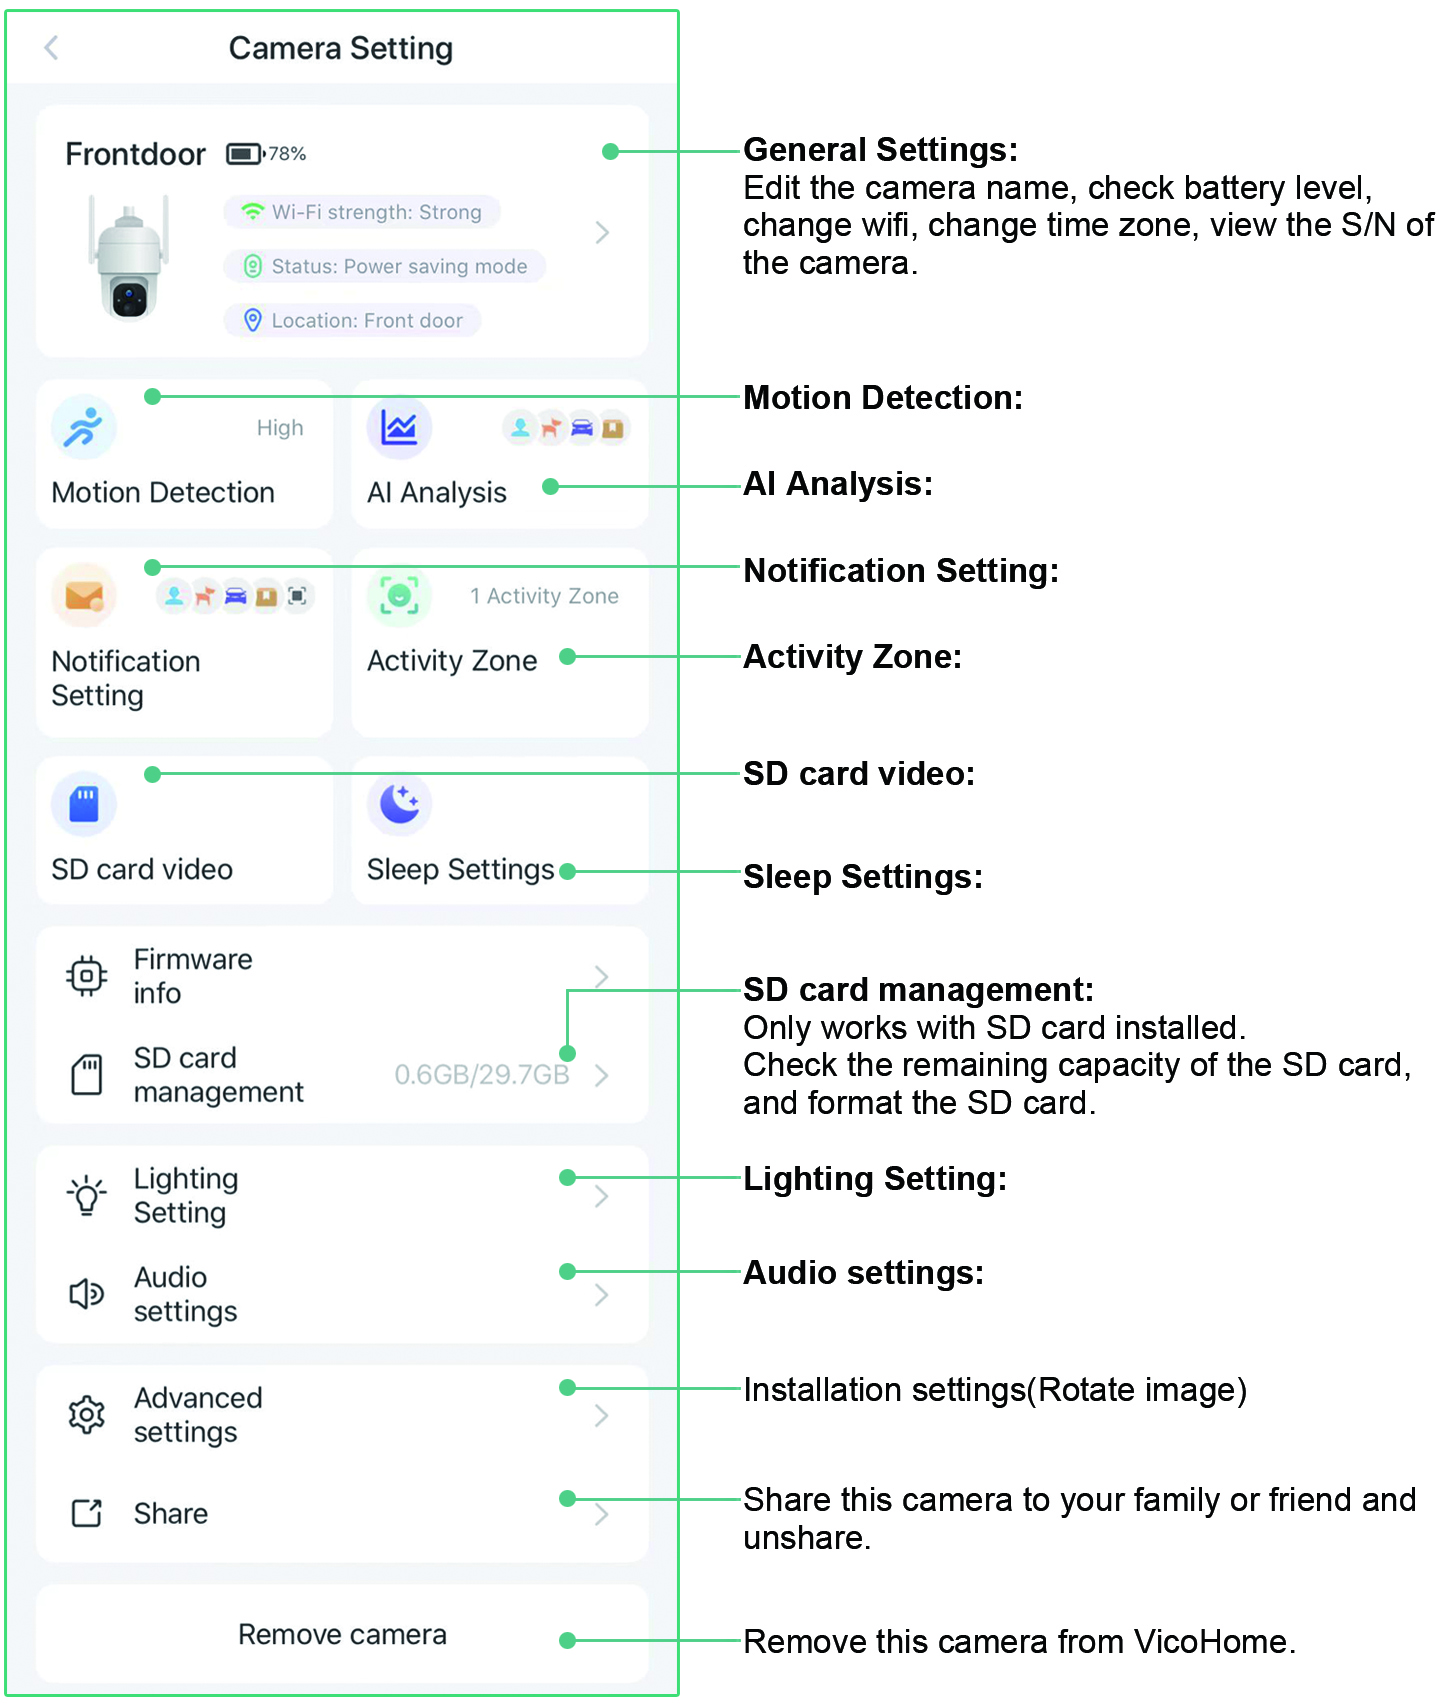
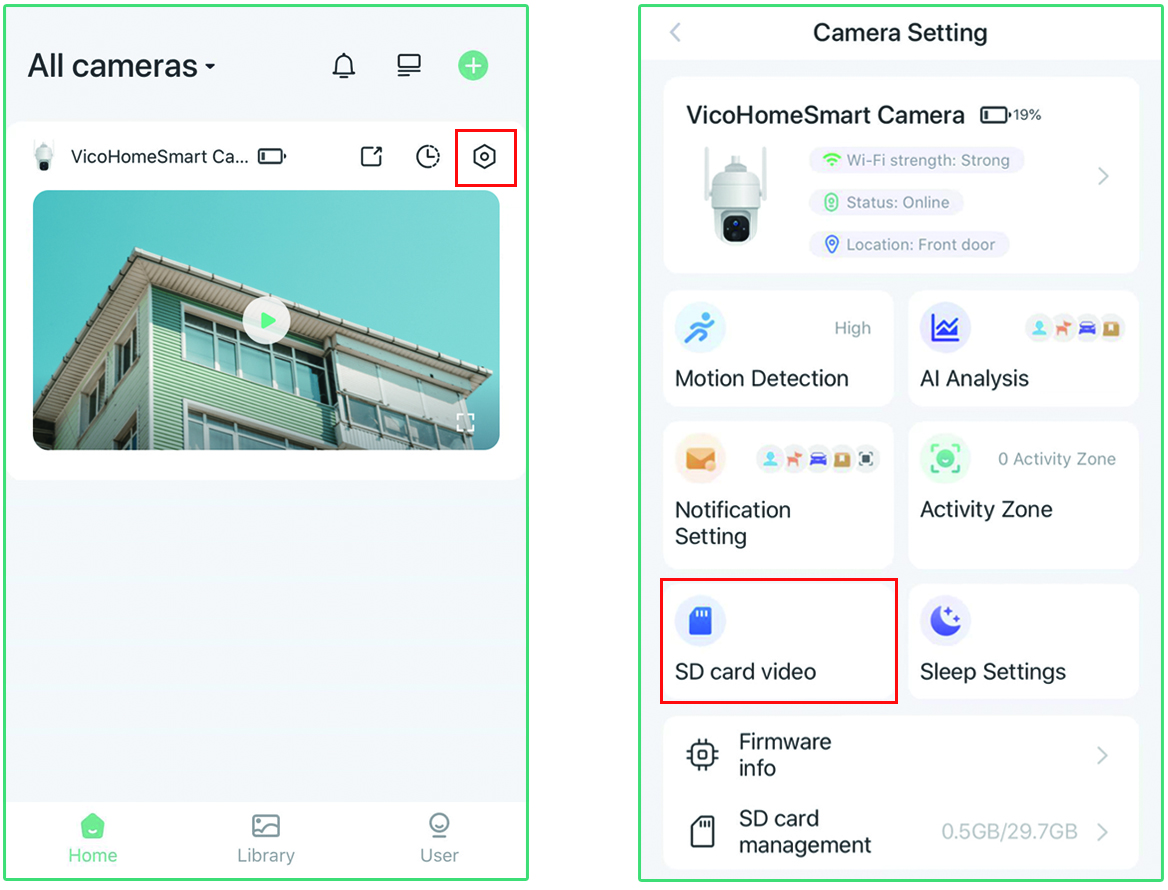
Click “Setting” button on the VicoHome homepage, enter Camera Setting interface → Click “SD card video”, enter SD card video interface.
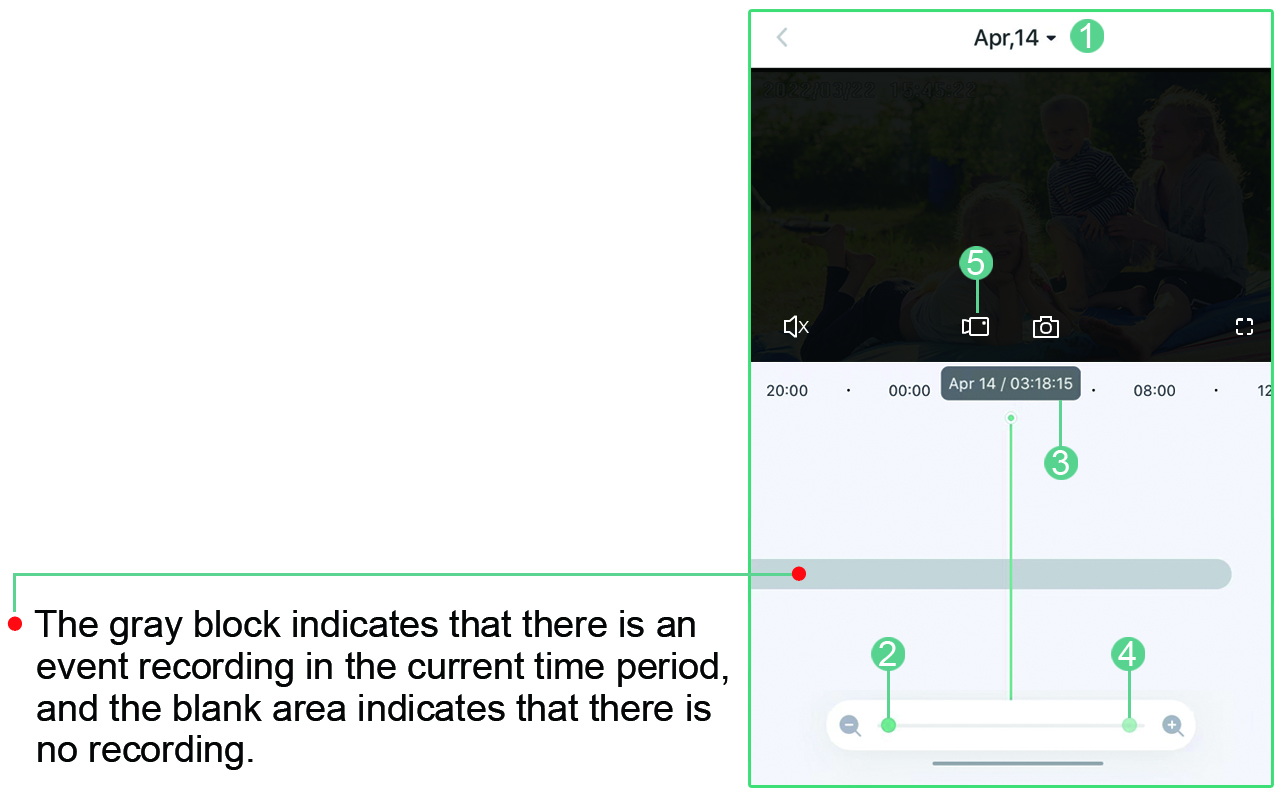
SD card video interface
1. Select the date
2. Drag the green dot to left zoom out the timeline.
3. Swipe left and right on the phone screen with your finger to find the approximate time.
4. Drag the green dot to right zoom out the timeline to check the specific time.
5. Click record video icon, the video will be recorded and saved in your phone album.

![[10CH,Expandable] All in one with 10.1](/uploads/image/3E2-2-01.jpg) [10CH,Expandable] All in one with 10.1
[10CH,Expandable] All in one with 10.1
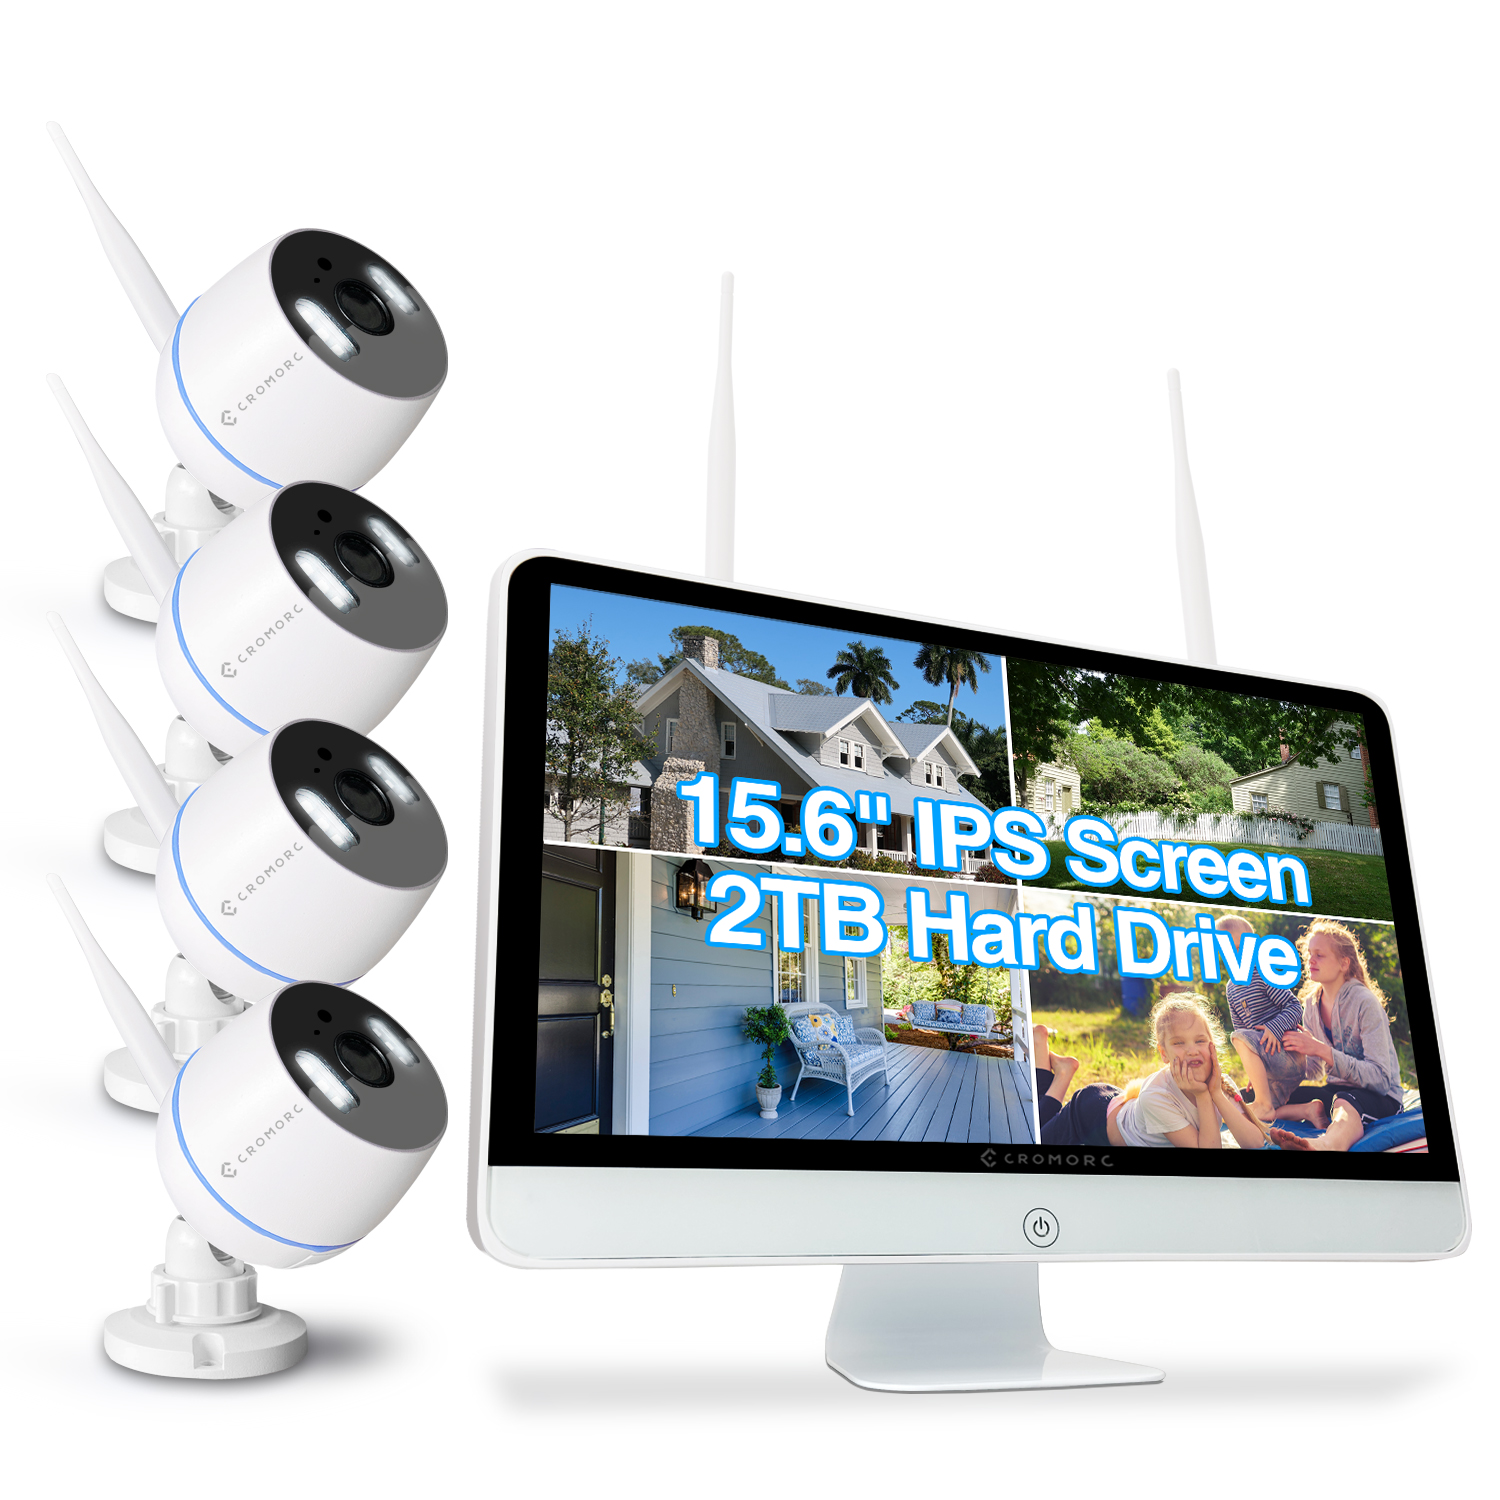 Cromorc All-in-one Wireless Security Camera System with 15.6" IPS Monitor, AI Human Detection, Floodlight,Siren Alarm, 2-Way Audio,4PCS 3MP Camera,Expandable 8CH NVR,Home Business Surveillance,2TB HDD
 Cromroc All-in-one Wireless Security Camera System with 12" Monitor, AI Human Detection, Floodlight,Siren Alarm, 2-Way Audio, 4PCS 3MP Camera, Expandable 8CH NVR,Home Business Surveillance, 1TB HDD
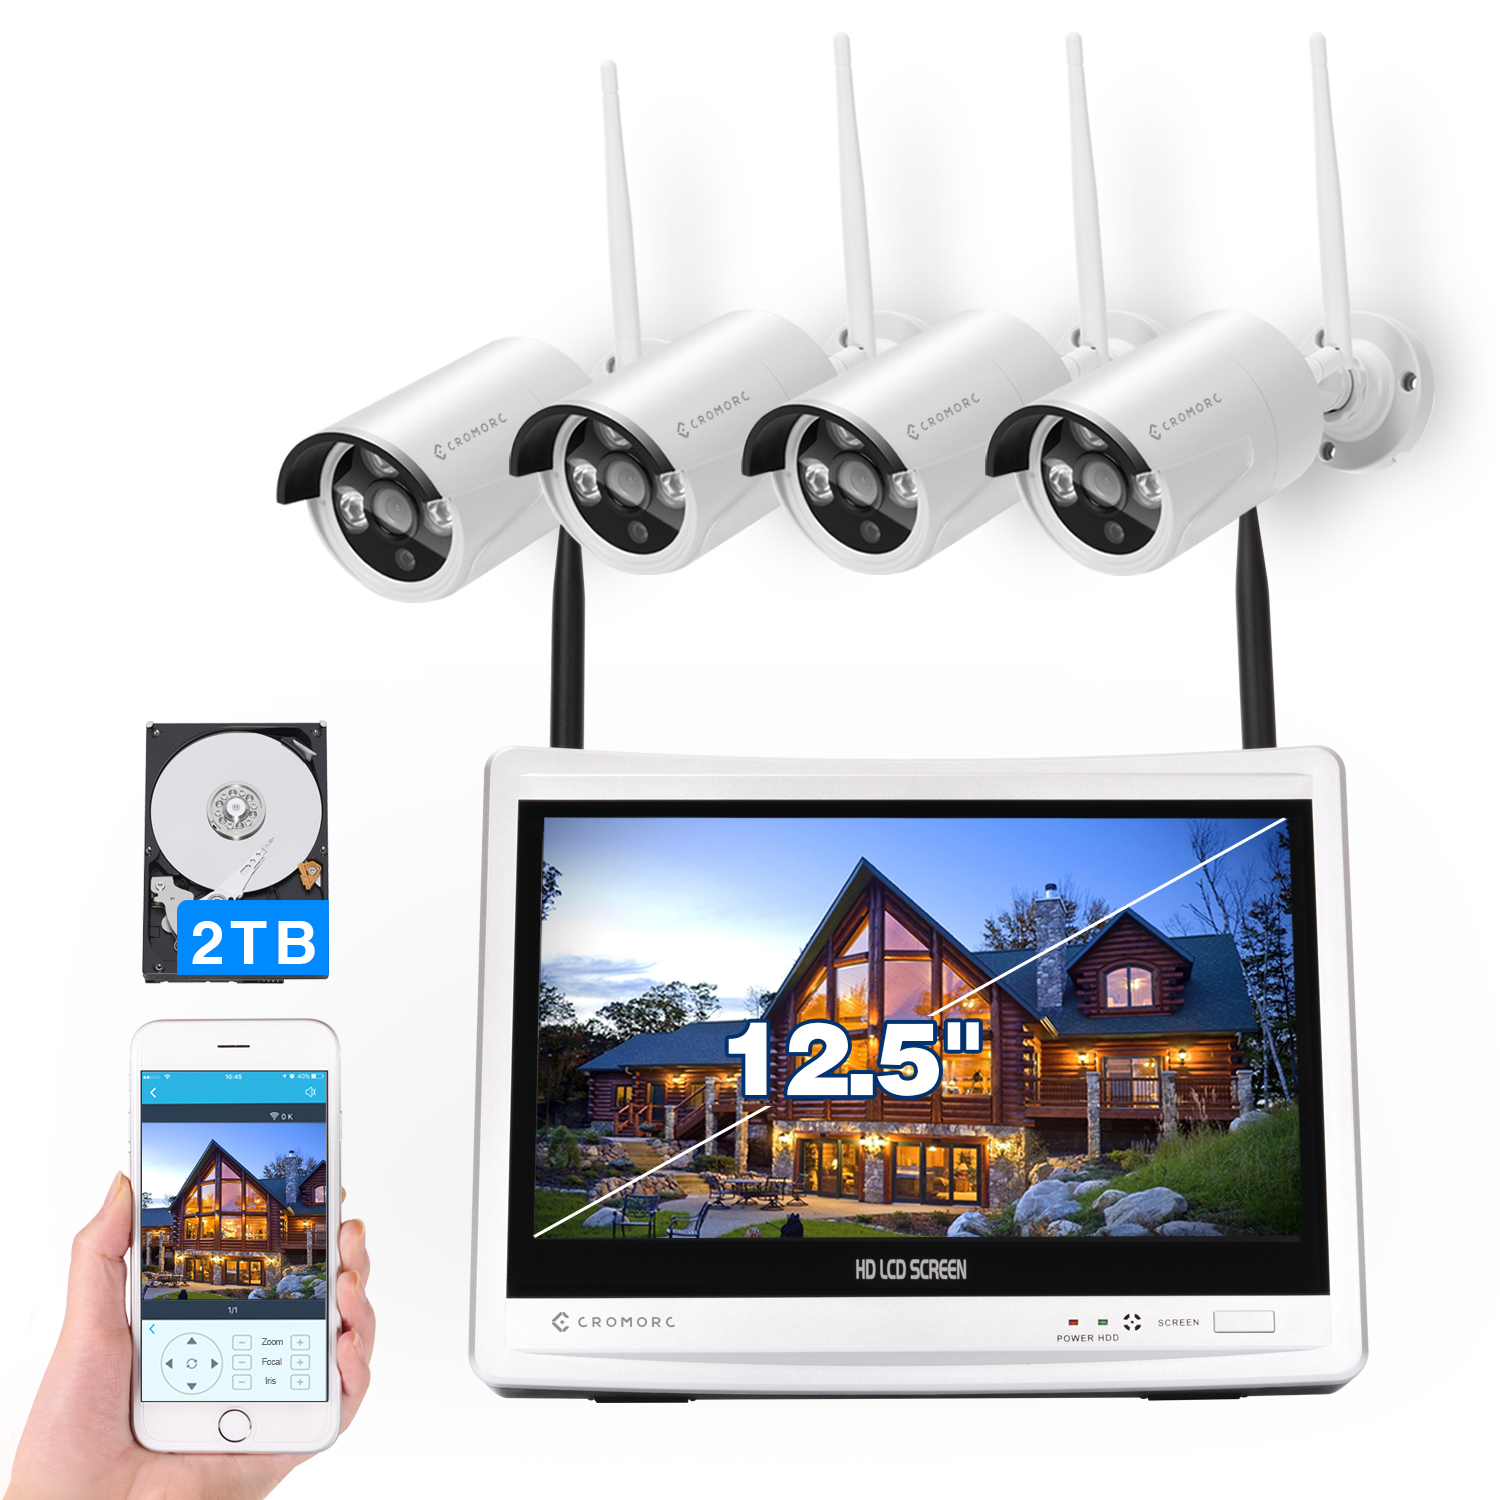 Wireless Security Camera System 12.5" Monitor,Home Business Surveillance Expandable 10CH NVR,4pcs 5MP Outdoor Indoor Night Vision 1-Way Audio Camera,Human Detection 3TB HDD