4. How to Set APP Alarm Push on Mobile Phone?
Make sure your NVR is connected to router(internet) for APP ararm push
1. NVR setting:
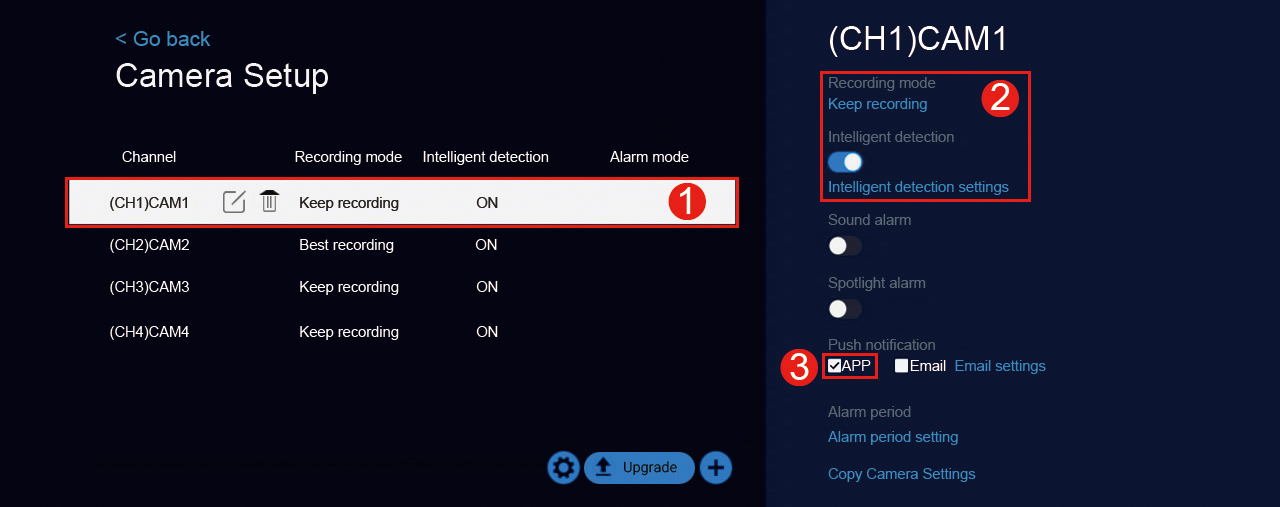
User Interface A:
Right click the mouse on the screen, left click “Camera”.
1. Left click to select the corresponding camera channel.
2. Set up recording mode and turn on intelligent detection.
3. Check the “APP” check box.
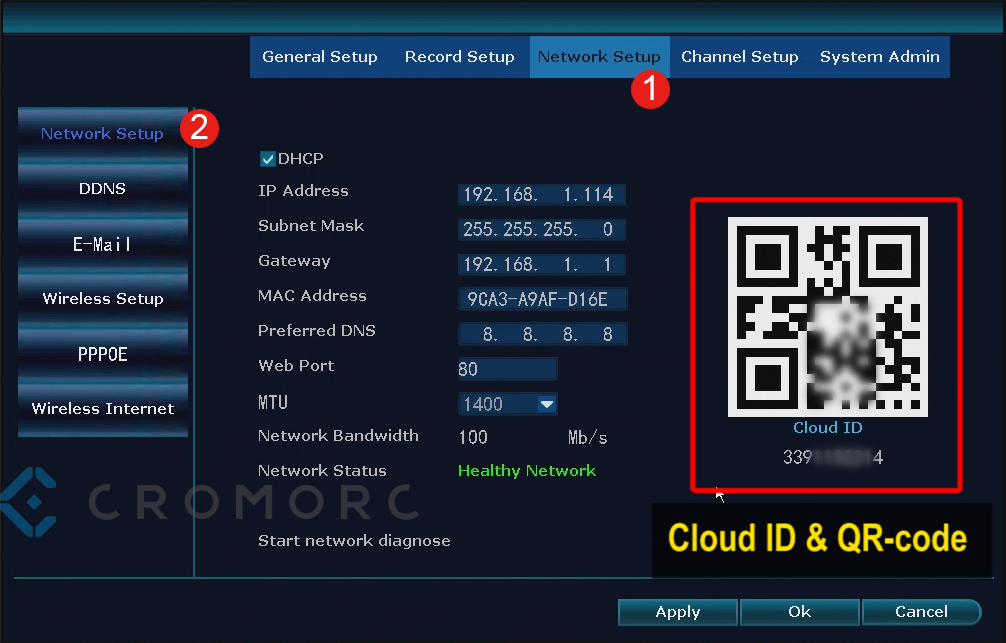
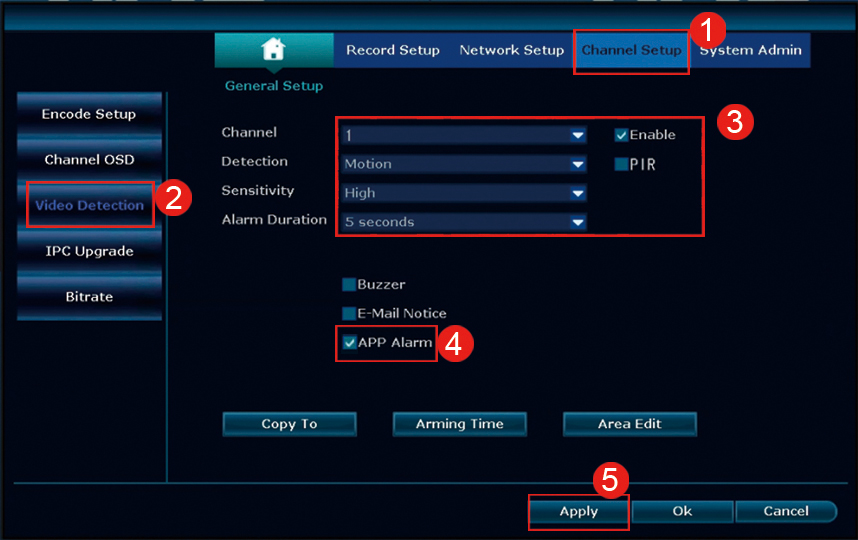
User Interface B:
Right click mouse on the screen, left click mouse System setup on the Menu Bar, enter the System Setup interface. Then operate in the following order:
1. Left click Channel Setup
2. Left click Video Detection
3. Check the Enable check box, and select the camera channel
4. Check the APP Alarm check box
5. Left click Apply or OK
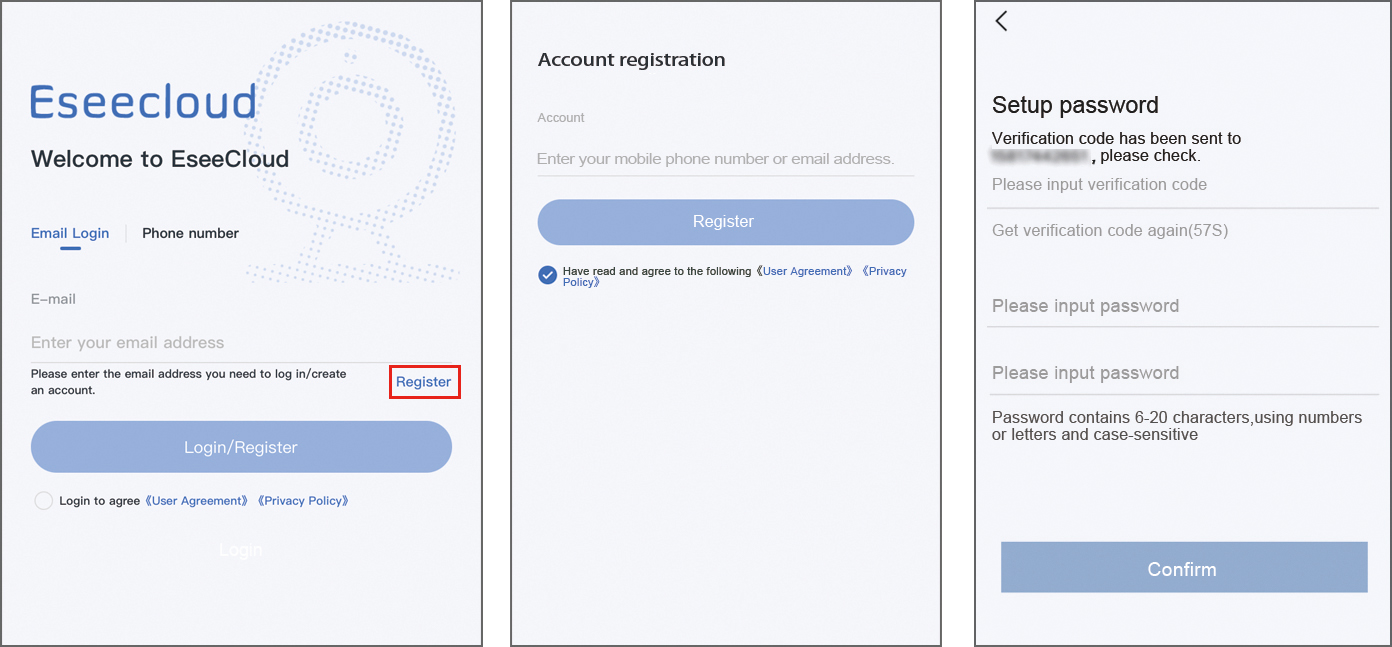
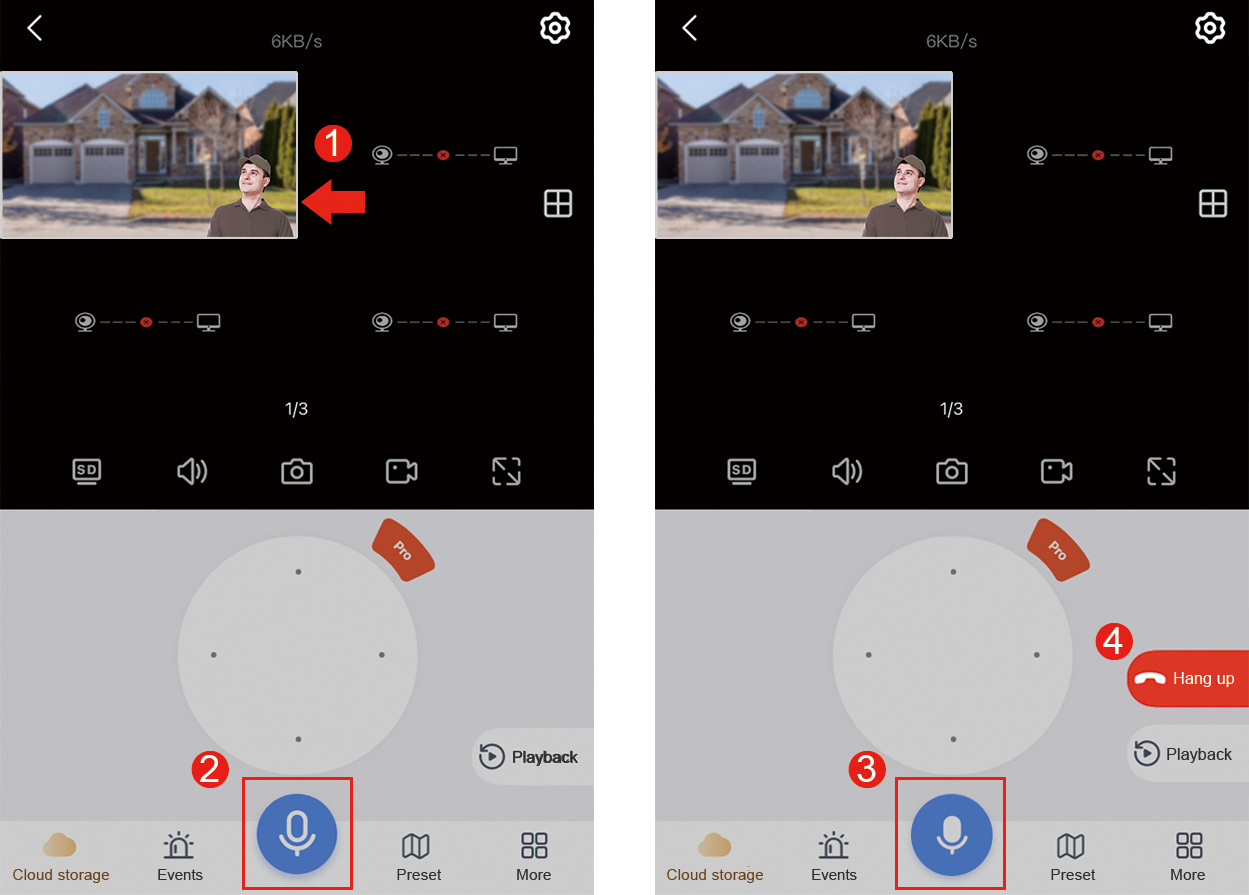
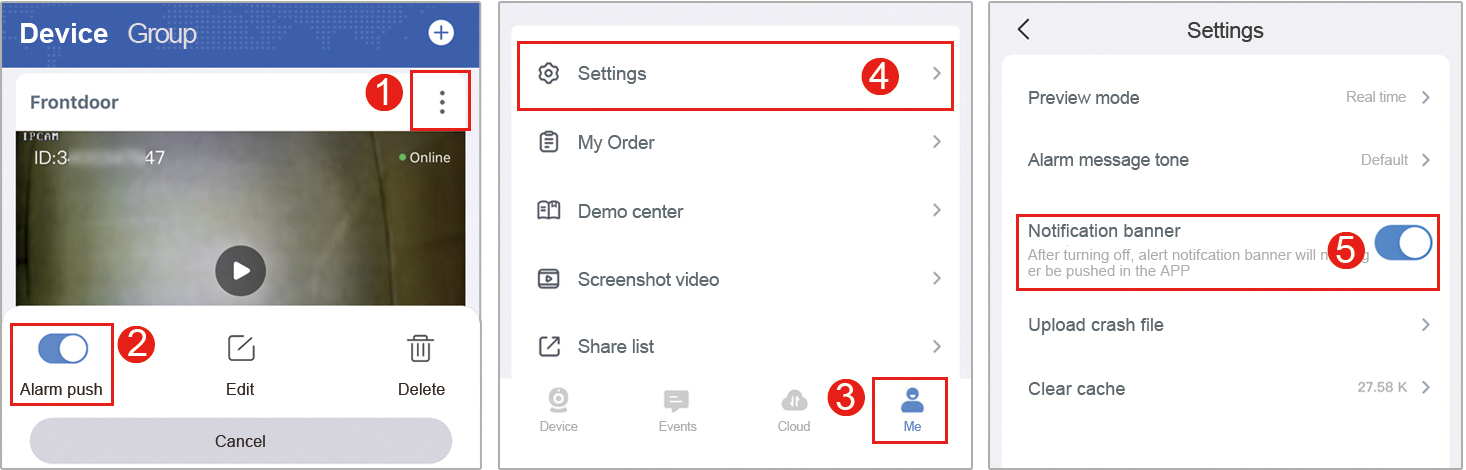
2. APP setting:
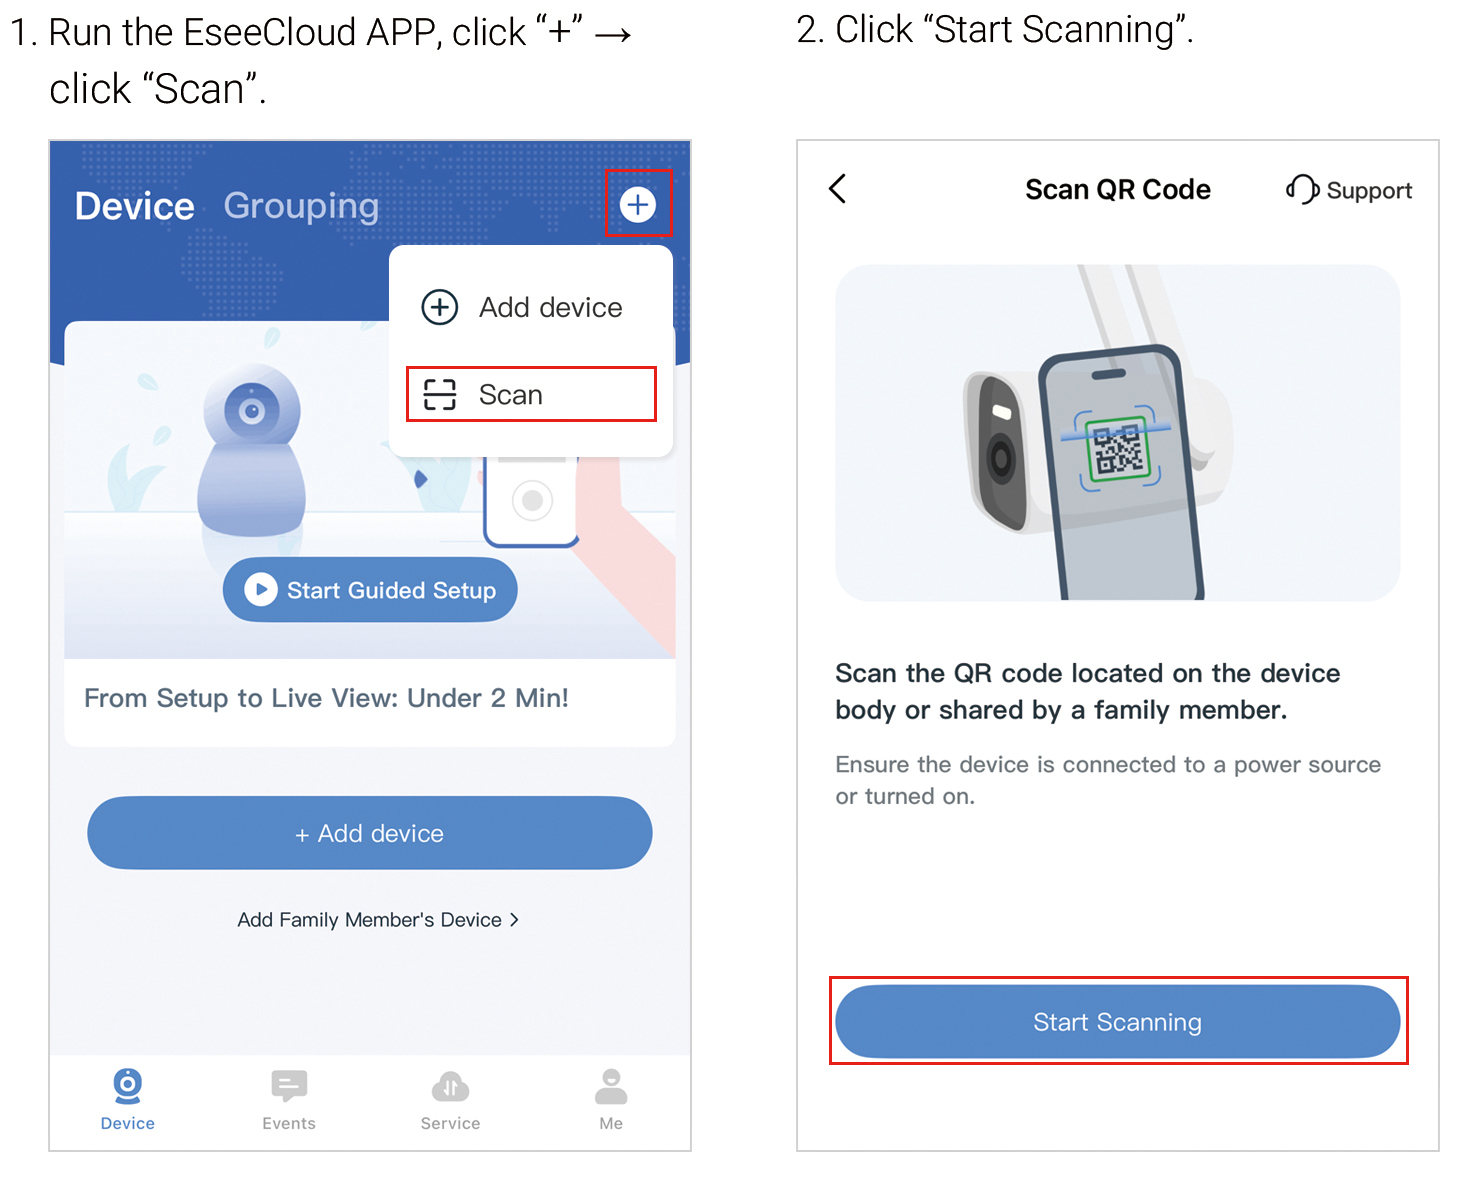
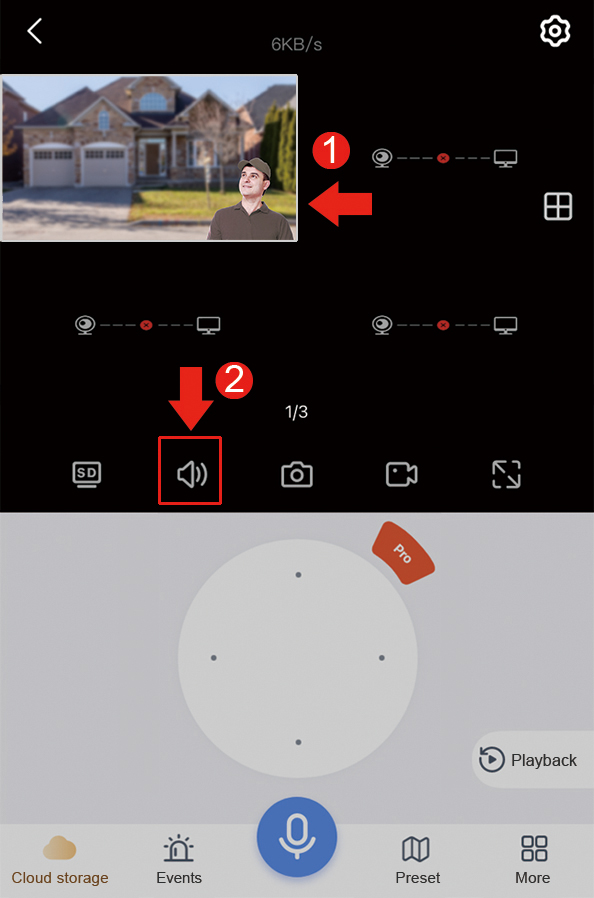
Login APP with the registered account → Click"…" button → Turn on “Alarm push” → Click “Me” → Click “Settings” → Turn on “Notification banner”.
3. Phone setting:
Turn on the Allow Notifications of APP in the setting of your mobile phone, then your mobile phone will receive a banner notification when the motion detection is triggered. Take iPhone for example:
Click “Settings” → Click “Notifications” → Click “EseeCloud”→ Turn on “Allow Notifications”.


![[10CH,Expandable] All in one with 10.1](/uploads/image/3E2-2-01.jpg) [10CH,Expandable] All in one with 10.1
[10CH,Expandable] All in one with 10.1
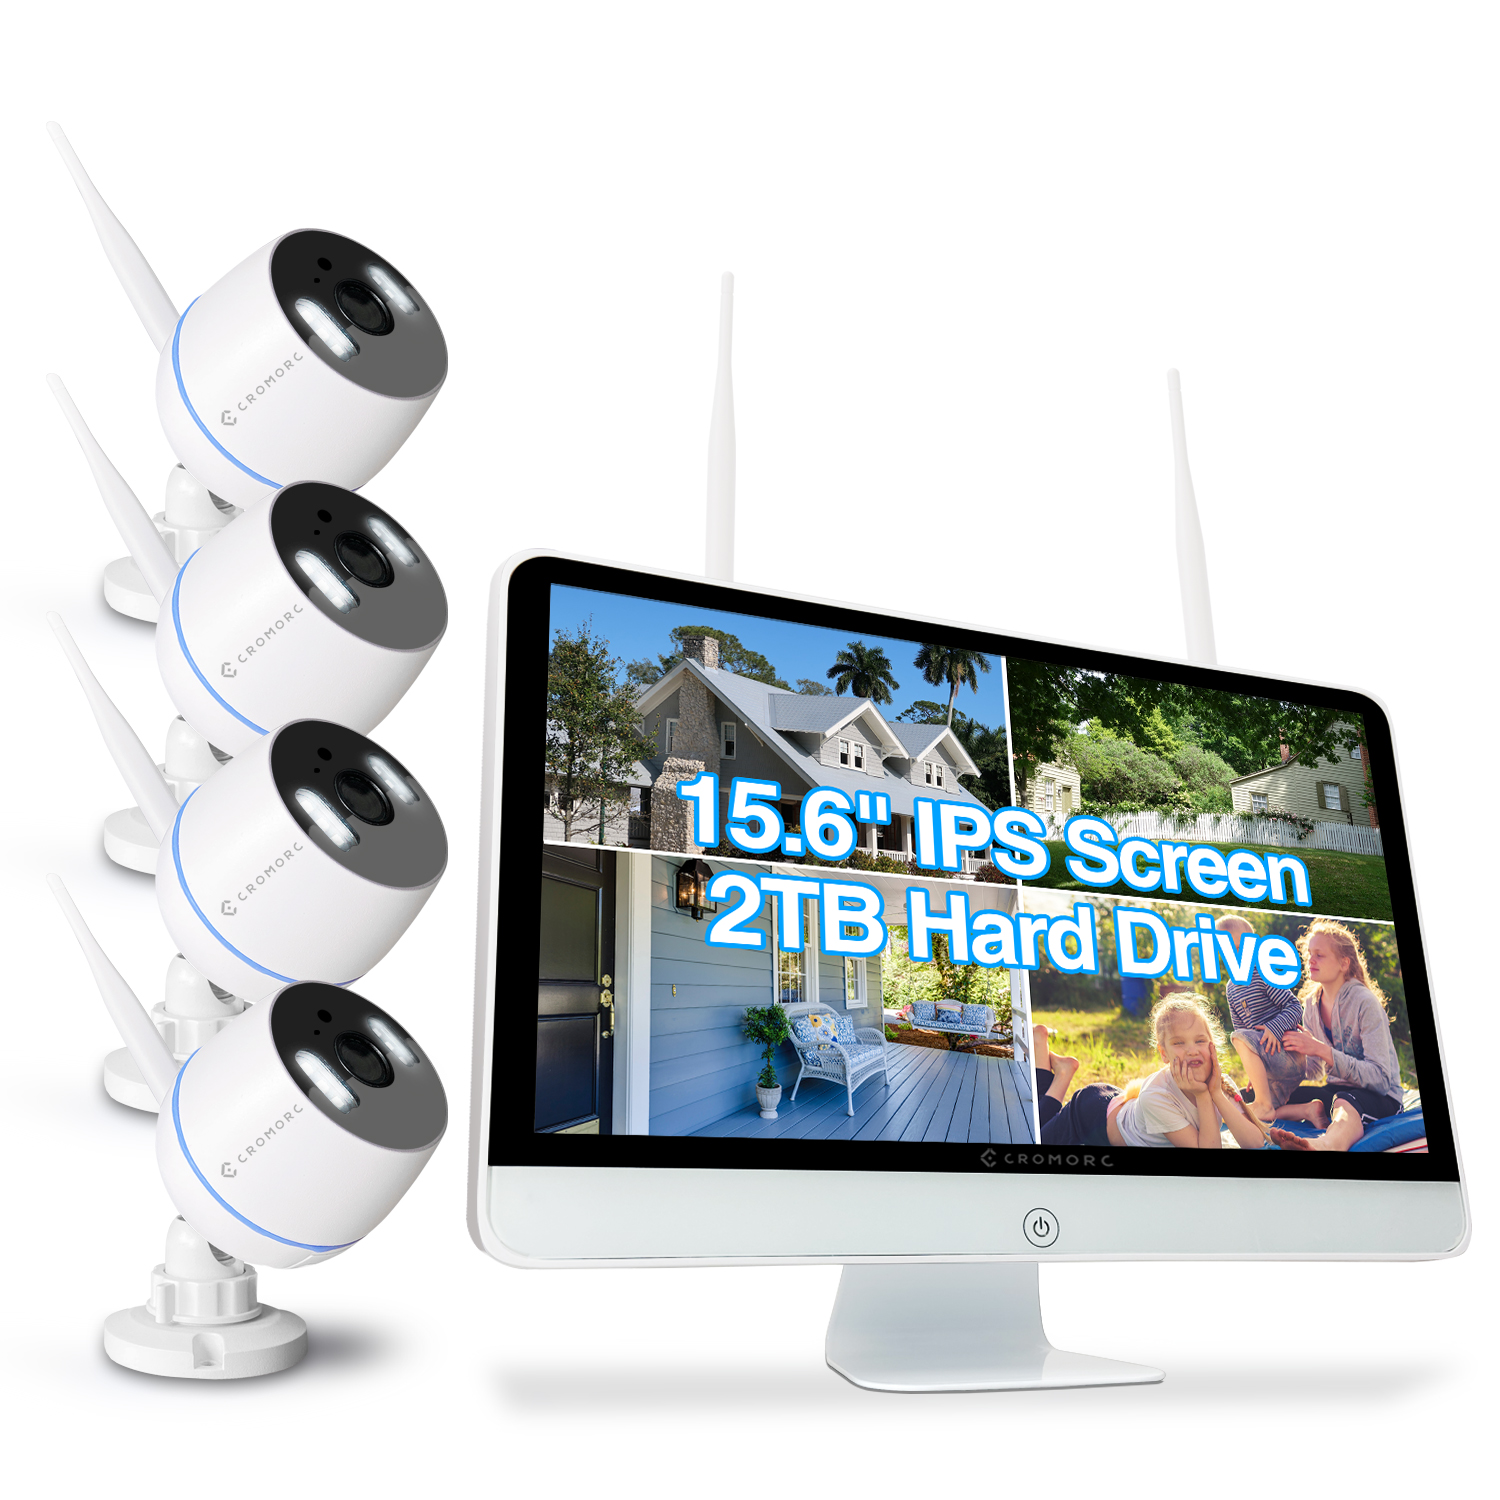 Cromorc All-in-one Wireless Security Camera System with 15.6" IPS Monitor, AI Human Detection, Floodlight,Siren Alarm, 2-Way Audio,4PCS 3MP Camera,Expandable 8CH NVR,Home Business Surveillance,2TB HDD
 Cromroc All-in-one Wireless Security Camera System with 12" Monitor, AI Human Detection, Floodlight,Siren Alarm, 2-Way Audio, 4PCS 3MP Camera, Expandable 8CH NVR,Home Business Surveillance, 1TB HDD
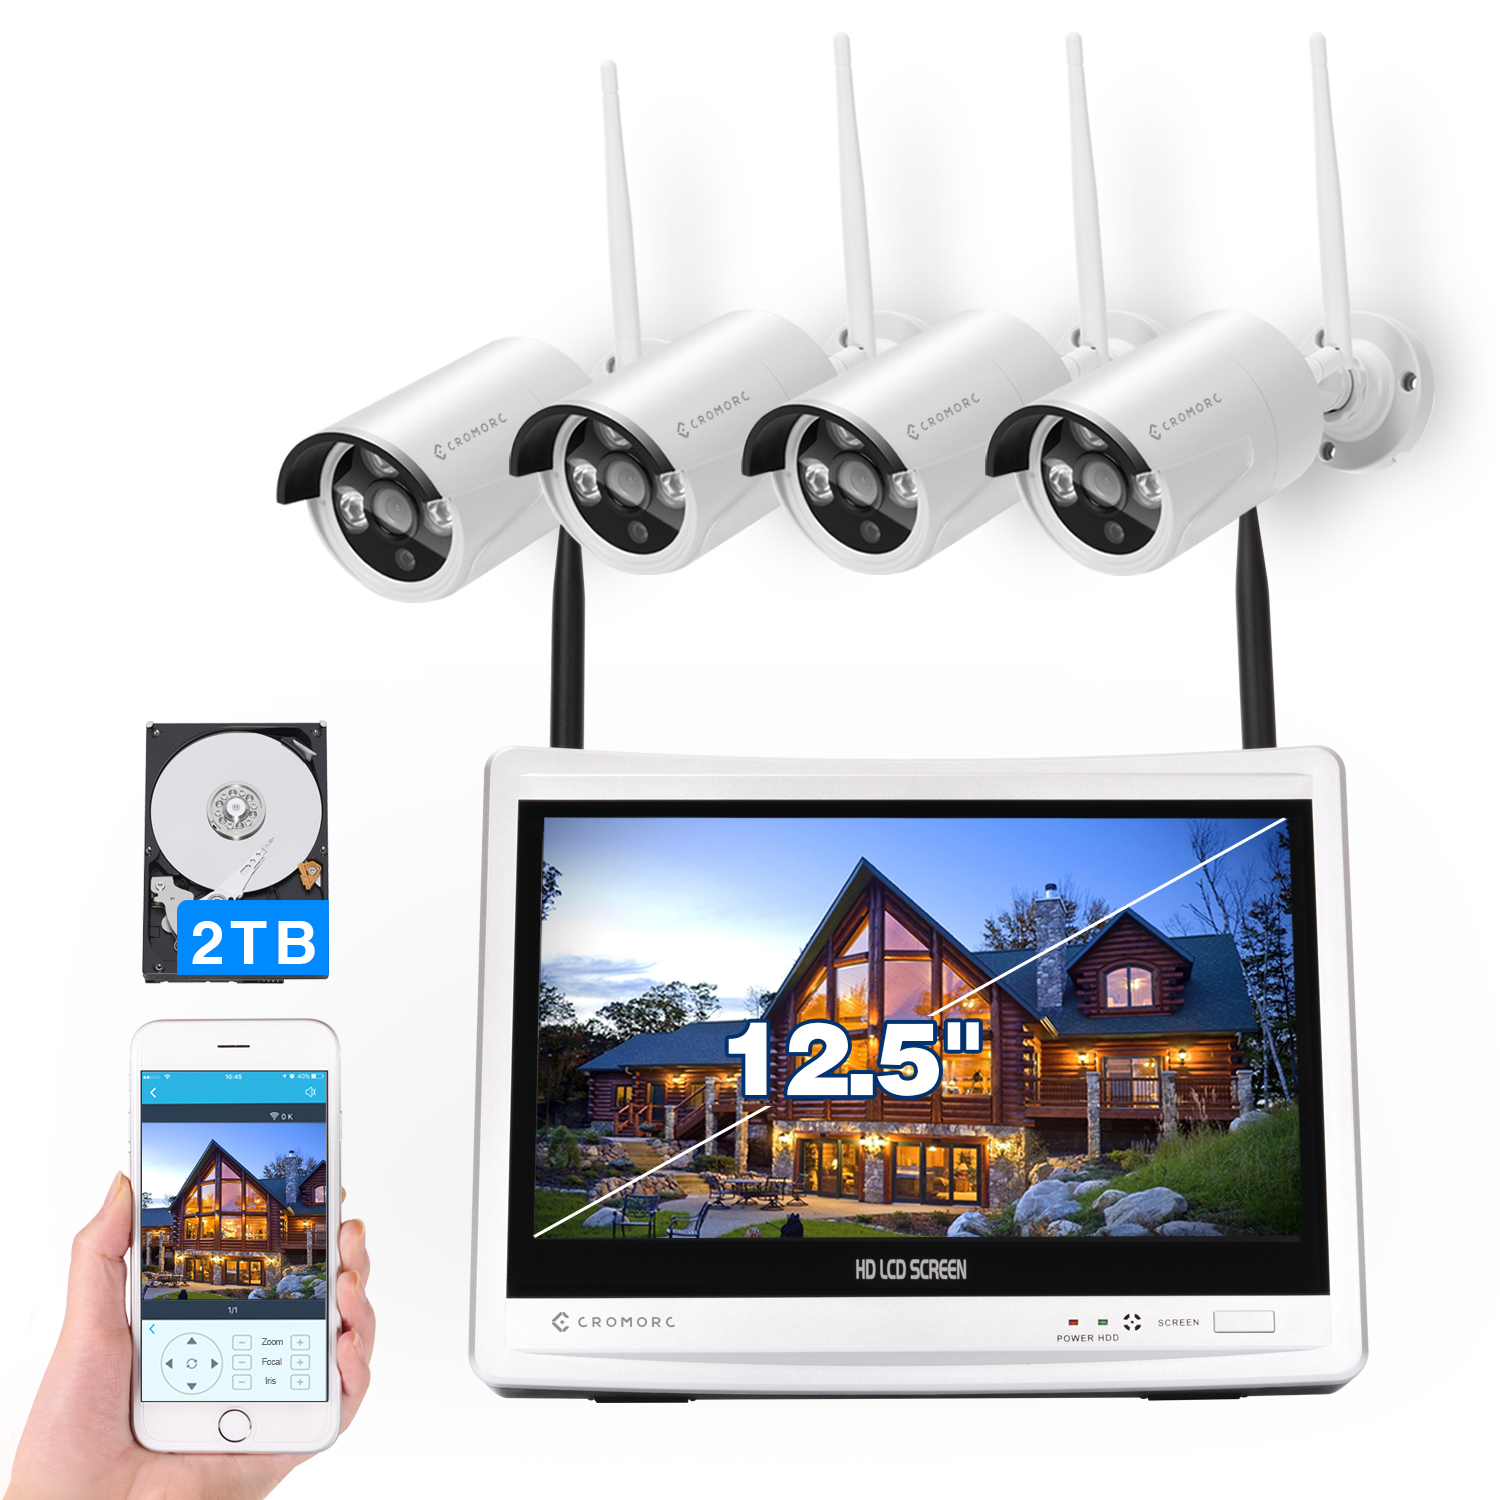 Wireless Security Camera System 12.5" Monitor,Home Business Surveillance Expandable 10CH NVR,4pcs 5MP Outdoor Indoor Night Vision 1-Way Audio Camera,Human Detection 3TB HDD